Ubuntu includes some useful utilities to get your dial-up connection up and running.Here is the following ways you can connect to your dialup connection
1)Using your networking option in Ubuntu
2)using gnome-ppp
3)using kppp (For Kubuntu)
4)using wvdialconf & wvdial
5)using pppconfig & pon/poff
first thing you need to make sure your modem drivers are installed or not.If you want more details about modem drivers in ubuntu and installation check here
Now we will see 3 ways how to configure dialup connection in ubuntu
Before Starting
Before configuring Dial-up connection you need to have the following information from your ISP
1)Username
2)Password
3)Dail-in number
Configuring a Dial-Up Connection using Networking option
you can go to System—>Administration —>Networking
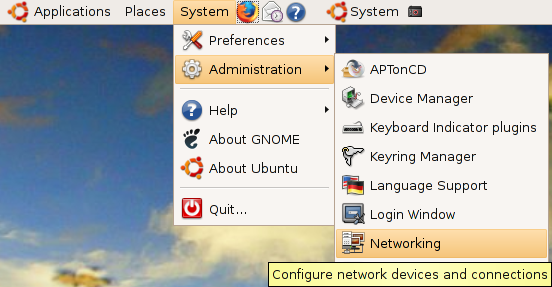
Once it open the application you should see the following screen

In the above screen select modem connection option and click on properties you should see the following screen

The first thing you will need to do is to enable the connection by ticking the Enable this connection box,now you need enter your ISP’s phone number as well as your username and password

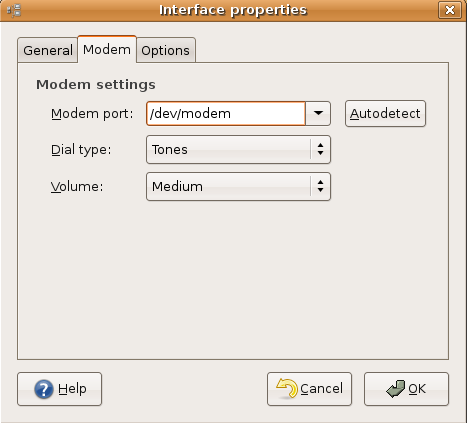
Next, click on the modem tab to specify details about your modem and also configure the speaker volume. Most telephone systems use tone dialling nowadays, so make sure this is selected . I have selected the speaker volume on medium.
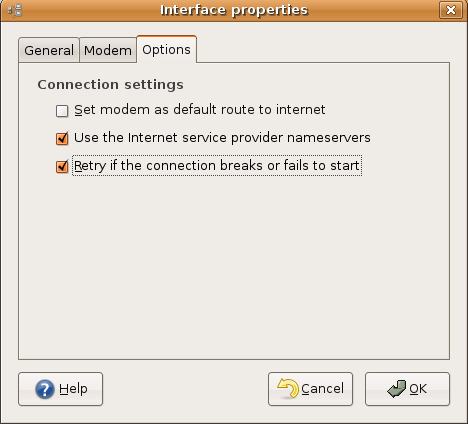
Now you need to click on options tab If you are using a laptop, then you will probably want to uncheck Set modem as default route to the Internet whilst you are on a LAN, otherwise you may struggle to see anything! Tick it when you are expecting to use your dial-up connection though, and Ubuntu will use this connection to get out onto the Internet.You need to select other two options checked.
Now You can use the Gnome Modem Monitor and Network Monitor panel if you want to stop, start and monitor modem connections.
Configuring a Dial-Up Connection using pppconfig
configure a connection using pppconfig, a command line utility to help you to configure specific dial-up connection settings.This is a command line based option to manage dialup connections.
Open a terminal from Applications > System Tools > Terminal and type
sudo pppconfig
Now you should see the following screen here you need to select “Create Create a connection” select ok and press enter

Here you need to enter provider name and you can leave default one and in this example i am giving “comcast” select ok and press enter

Next screen you need to select “Dynamic Use dynamic DNS” select ok and press enter

You need to select Authentication method here i am selecting “chat :Use chat for login/password :Authentication” select ok and press enter

Select login prompt option leave default select ok and press enter

Select password prompt option leave default select ok and press enter

Enter the username given to you by your ISP in this example i am using “ruchiw” select ok and press enter

Enter the password given to you by your ISP in this example i am using “myfirstpassword” select ok and press enter

Enter the modem speed as “115200″ select ok and press enter

Select method of dialing as “Tone” select ok and press enter

Enter the number to dial select ok and press enter

Choose your modem configuration method if you want to detect your modem automatically select yes otherwise select no in this example i am selecting no select ok and press enter

Select the modem port and i leave the default option select ok and press enter

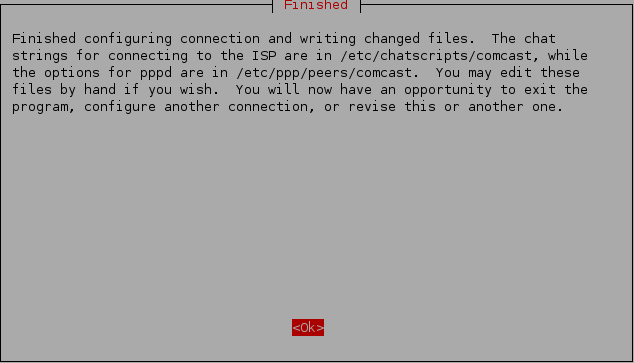
Here is the complete details you have choosen for your provider connection in this example comcast

Finished the connection settings select ok and press enter
Select “Quit Exit this utility”
Exit the terminal window using the following command
exit
Connecting to your ISP
Before you connect for the first time you need to add yourself to both the dip and dialout groups by using the commands
sudo adduser YOURNAMEHERE dip
sudo adduser YOURNAMEHERE dialout
# connect to the ISP configured as “comcast”
pon comcast
# disconnect the ISP configured as “comcast”
poff comcast
If you are trying to connect as default “provider” you need to use the following commands to connect and disconnect
pon
poff
You can check the last messages generated by these commands with
# shows the (status) messages generated by pon and poff
plog
Configuring a Dial-Up Connection using gnome-ppp
GNOME PPP is an easy to use graphical dialup connection configuring and dialing tool with system tray icon support.It uses GNOME/GTK+ for its graphical interface and integrates well in GNOME desktop environment, but it can be used in other environments.
It also uses WvDial dialer as its backend, providing simple configuration via config files. You can also use plain wvdial if you don’t have X running.
Install gnome-ppp Ubuntu
sudo apt-get install gnome-ppp
This will complete the installation.
If you want to open the application go to Application—>Internet—>GNOME PPP

Once application opens you should see the following screen

In the above screen you need to click on setup to configure your settings you should see the following screen configre the modem settings

Next click on networking tab to configure network settings

Next click on options tab to configure general options

Once you have all the details enter the details you can see the following screen


